Where PuTTY Stores Its Settings and How to Move Sessions to Another Computer

Sometimes you need to move a whole bunch of servers saved in PuTTY to another computer. Adding them by hand is a pain, and it takes a long time.
In short: PuTTY stores its settings not in a file next to putty.exe but in the Windows registry, under HKCU\Software\SimonTatham\PuTTY (HKCU stands for HKEY_CURRENT_USER). Saved sessions are in the Sessions subkey. To move them, export this key to a .reg file and import it on the new computer.
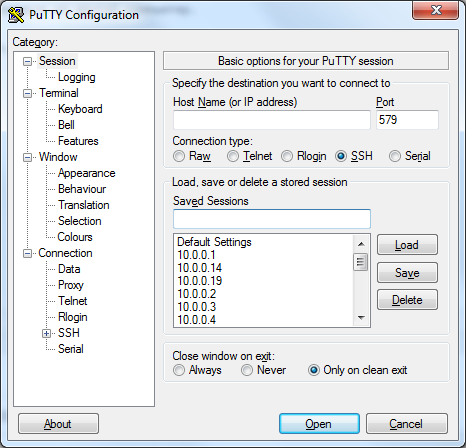
Let me show you where exactly everything is and how to move your sessions in a couple of minutes.
Where PuTTY stores its settings
PuTTY, the client usually used to connect to a server over SSH, writes all its settings to the current user’s registry:
HKEY_CURRENT_USER\Software\SimonTatham\PuTTY
There are two important subkeys inside:
- Sessions – saved sessions: server addresses, ports, user names, character set, colors, paths to keys;
- SshHostKeys – the keys of servers you have already connected to. If you move them too, PuTTY on the new computer will not ask again whether you trust the server.
It is not clear why the developers chose the registry instead of a config file next to putty.exe. PuTTY cannot store its settings in a file; the documentation only describes a workaround with a .bat file that imports a .reg file before starting PuTTY and exports it back after you exit.
How to move sessions with Registry Editor
- Press Win+R, type regedit and open the PuTTY key at the path shown above.
- Right-click the PuTTY folder, select Export and save the file, for example as
putty.reg. - Copy the file to the new computer, double-click it and confirm adding the information to the registry.
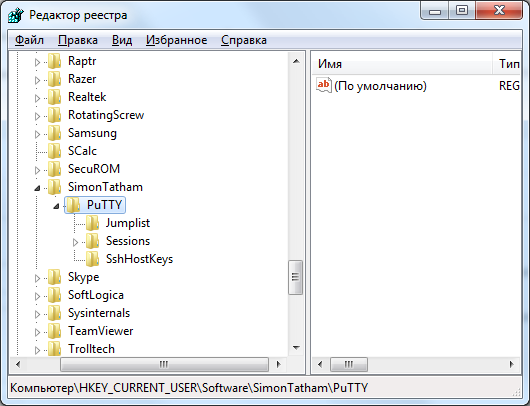
Done: when you start PuTTY, all the sessions will be in the list.
The same from the command prompt
On the old computer, in the command prompt:
set K=HKCU\Software\SimonTatham\PuTTY
reg export %K% putty.reg
On the new one, in the folder where you copied the file:
reg import putty.reg
Administrator rights are not needed: the key belongs to the current user. If you only need the sessions without the server keys, export the %K%\Sessions subkey.
What is not moved with the registry
- .ppk key files. A session stores only the path to the key, so copy the file itself separately. If it is in a different folder on the new computer, fix the path in the session settings: Connection → SSH → Auth.
- Passwords. PuTTY does not remember them at all – this is deliberate, for security reasons.
- The PUTTY.RND file with random data in the Application Data folder. There is no need to move it, PuTTY will create a new one.
How to remove PuTTY settings from the old computer
If you uninstall PuTTY via Programs and Features, the saved sessions stay in the registry. To erase them together with the PUTTY.RND file, run this before uninstalling:
putty -cleanup
PuTTY will ask for confirmation and remove only the current user’s settings.
Other options
- WinSCP can import PuTTY sessions: in the login window choose Tools → Import Sites.
- KiTTY is a modified version of PuTTY with a number of handy extras. They say it makes moving settings easier :-)
More about PuTTY on the blog: UTF font and garbled characters in the Linux console.