Inter Atletika ST 021.1 Wall-Mounted Pull-Up Bar: Buying, Anchors and Mounting on a Brick Wall

I’d wanted a pull-up bar at home for a long time: a good, sturdy and inexpensive one. But, as people say, I never had the time :-) In fact, that was just self-deception: I didn’t want it badly enough. When you really want something, you find the time and everything else.
 Inter Atletika ST 021.1 wall-mounted pull-up bar
I was already thinking about where to get a pipe and everything else, but a friend said: why bother? A local electronics store sells a ready-made bar for about 300 UAH (about $15), and that’s it. I checked the store’s website, and sure enough, it was just what I needed: the Inter Atletika ST 021.1 wall-mounted pull-up bar.
Back then it cost 280 UAH on sale (about $14), and now it’s 381 UAH, also on sale (about $17). In six months the price went up by 101 UAH, or 36%. That’s inflation for you.
What the manual says
I ordered it, drove over on the weekend and picked it up. But buying a pull-up bar is only half the job; you still have to mount it. Let’s look at the manual.
 Mounting diagram from the manual: a 10×80 M8 anchor
The key points from the manual:
- the bar may only be mounted on a load-bearing or strong enough wall (concrete, brick);
- you need 4 anchors, 10×80 M8, and they are not included;
- drill 10 mm holes as deep as the anchor;
- choose the height according to the user’s height.
Anchors and the drill bit
Actually, I bought the anchors before I picked up the bar and read the manual: I stopped by the Budmen hardware store and grabbed several sizes “by eye” and by price. Some of the anchors were still at the old price, so I bought extra: after the price increase, the same ones cost 2–3 times more.
At home I laid everything out and decided to go to the Epicentr DIY store for longer anchors and a masonry bit. My old Soviet-era bits were too short, and of my masonry bits one was too thin and the other far too thick.
 12×129 anchors
I took 12×129 anchors: they were cheap, so I bought extra, both in number and in length. To go with them I picked a 12 mm concrete drill bit, 260 mm long.
 Anchors and a 12 mm drill bit
I didn’t buy the most expensive supplies, just decent ones. The wall is brick, and brick is easier to drill than concrete.
 Choosing the fasteners :-)
Mounting
The rest is straightforward:
- hold the bar against the wall and find the right position;
- mark the holes in the brackets with a pencil;
- drill;
- put the bar back, insert the anchors and tighten them.
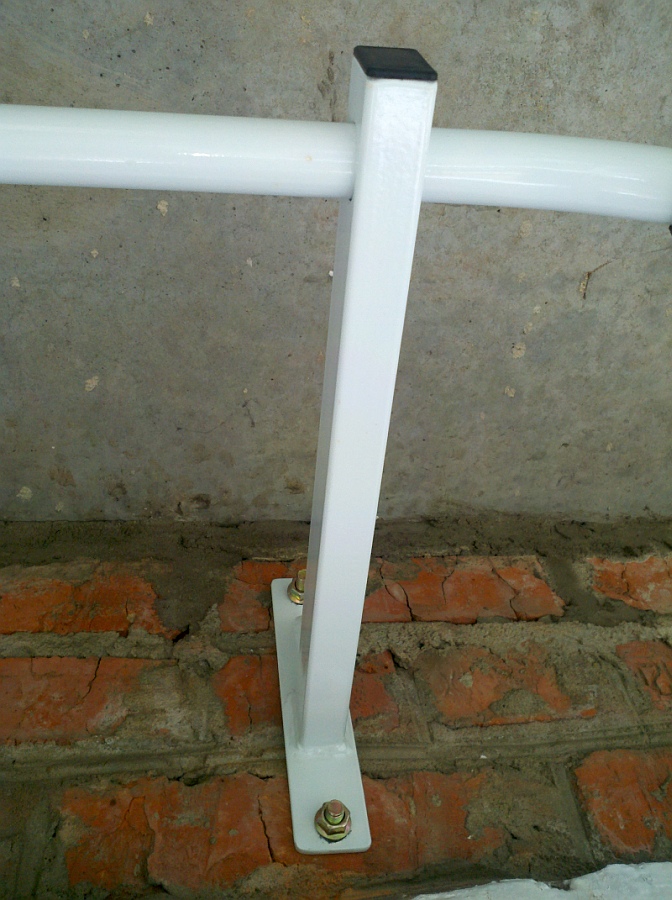 The bar anchored to a brick wall
I mounted the bar on the balcony above the door so I could hang at full length without bending my legs. I chose the spot so that the anchors would go into the middle of a brick, not its edge or a mortar joint.
It’s a pity the wall isn’t concrete, but the anchors are long and thick, and there are four of them, so the whole thing turned out quite solid.
Which anchors to use for a brick wall
A tip from experience: thicker anchors aren’t always better. My 12 mm ones turned out to be too thick: over time, the brick under them cracked. So:
- use the anchor diameter given in the manual (10 mm, M8, for this bar) and get extra strength from length, not thickness;
- drill into the middle of the brick, away from edges and joints;
- if the brick is hollow, look at chemical anchors (an adhesive injected into the hole): manufacturers make formulas specifically for hollow brick;
- if you have a choice, mount the bar on a concrete wall: it holds better than brick.