How to Change the Default Gateway From the Windows Command Line

Sometimes you need to swap the default gateway on a Windows machine quickly – for example, routing traffic temporarily through another router, cutting internet access while keeping local LAN alive, or automating route switches in a script.
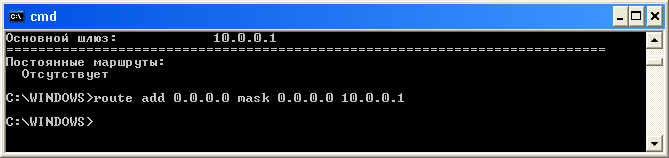
Doing it from an elevated Command Prompt or PowerShell window is far faster than digging through network adapter properties every time.
Check Current Routes and Gateway
Before modifying anything, inspect your active routing table and network interface indexes (the Interface column):
route print -4You can also view the same table with netstat -rn. Your default gateway is the entry with destination 0.0.0.0 and netmask 0.0.0.0.
Add, Change, or Delete the Default Route via route (cmd)
Run these commands in Command Prompt as Administrator (replace 10.0.0.1 with your router’s IP address):
- Add a temporary default gateway (lasts until reboot):
route add 0.0.0.0 mask 0.0.0.0 10.0.0.1 - Add a persistent default gateway (survives reboot with
-p):route -p add 0.0.0.0 mask 0.0.0.0 10.0.0.1 - Change an existing gateway without deleting it first:
route change 0.0.0.0 mask 0.0.0.0 10.0.0.2 - Remove the default gateway (LAN stays up, internet traffic stops):
route delete 0.0.0.0 mask 0.0.0.0
If the computer has multiple active interfaces (such as Ethernet, Wi-Fi, or VPN), specify both the metric and interface index IF from route print -4:
route add 0.0.0.0 mask 0.0.0.0 10.0.0.1 metric 10 if 12Managing the Default Route in PowerShell
On Windows 10, 11, and Windows Server, PowerShell’s NetTCPIP cmdlets are cleaner for scripts. Instead of hardcoding an adapter name like “Ethernet”, grab the active physical adapter dynamically so VPN and virtual interfaces stay untouched:
$ifIndex = (Get-NetAdapter -Physical | Where-Object Status -eq 'Up' | Select-Object -First 1).ifIndex
Get-NetRoute -DestinationPrefix "0.0.0.0/0" -InterfaceIndex $ifIndex
Switch the default gateway to 10.0.0.1 on that physical adapter:
Remove-NetRoute -DestinationPrefix "0.0.0.0/0" -InterfaceIndex $ifIndex -Confirm:$false
New-NetRoute -DestinationPrefix "0.0.0.0/0" -InterfaceIndex $ifIndex -NextHop 10.0.0.1
Setting It Permanently via GUI (ncpa.cpl)
If DHCP is enabled on the adapter, the router may push its default gateway back on lease renewal. To lock a gateway permanently in the Windows UI:
- Press
Win+R, typencpa.cpl, and press Enter. - Right-click your active network adapter → Properties → Internet Protocol Version 4 (TCP/IPv4) → Properties.
- Enter a static IP, subnet mask, and Default gateway (or leave Default gateway blank if this machine should stay LAN-only).
route delete 0.0.0.0 on a remote server cuts your connection immediately. On remote hosts, always switch gateways atomically with route change or make sure you have IPMI / KVM console access ready.For quick local gateway tweaks, the classic route delete 0.0.0.0 and route add 0.0.0.0 mask 0.0.0.0 <IP> pair remains just as reliable on Windows 11 as it was a decade ago.